How To Create FreeNAS Windows SMB Share. Step By Step

How To Create FreeNAS Windows SMB Share. Step By Step. FreeNAS 11
In this article I will show how to configure Windows SMB share on FreeNAS. And how to access from windows to FreeNAS shared SMB folders.
FreeNAS in 11.2-RELEASE introduce web interface. About how to use new web interface for Windows share configuration, read this article: How To Create FreeNAS Windows SMB
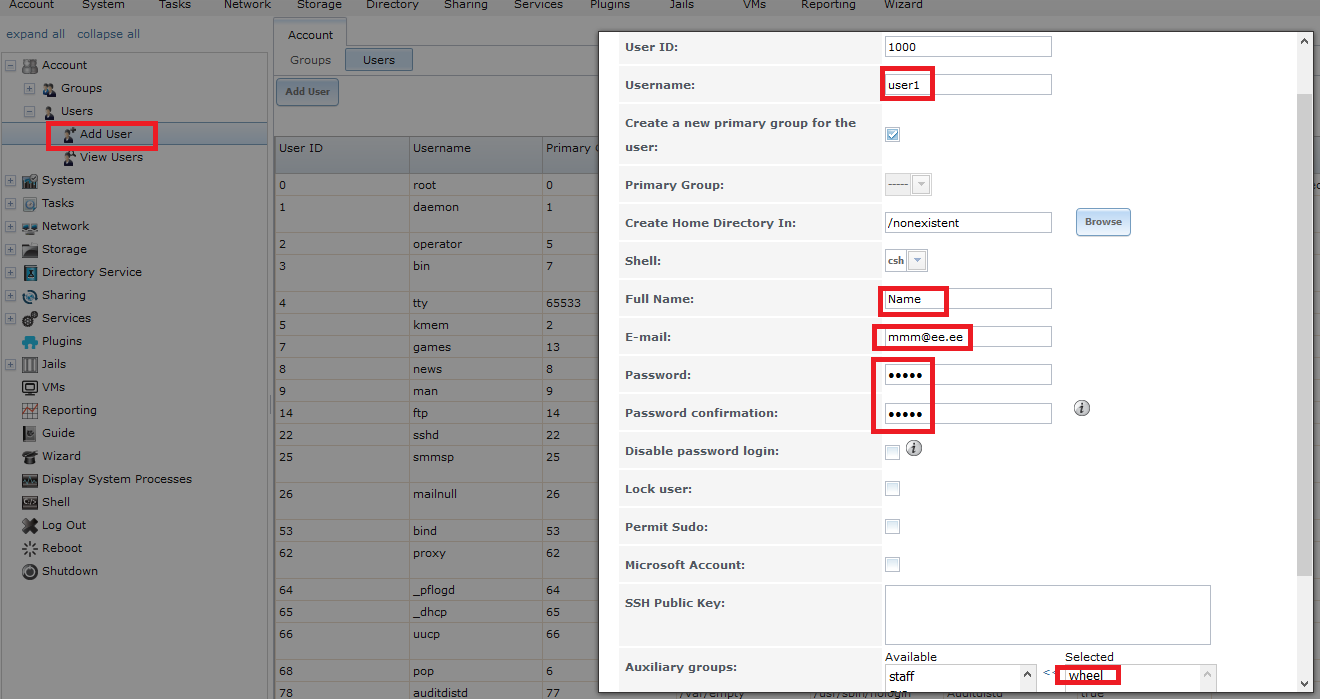
1. Add new user
To add FreeNAS samba user goto Users -> Add User. In next window set username, Full Name, e-Mail, Password. In Auxiliary groups chose “wheel”
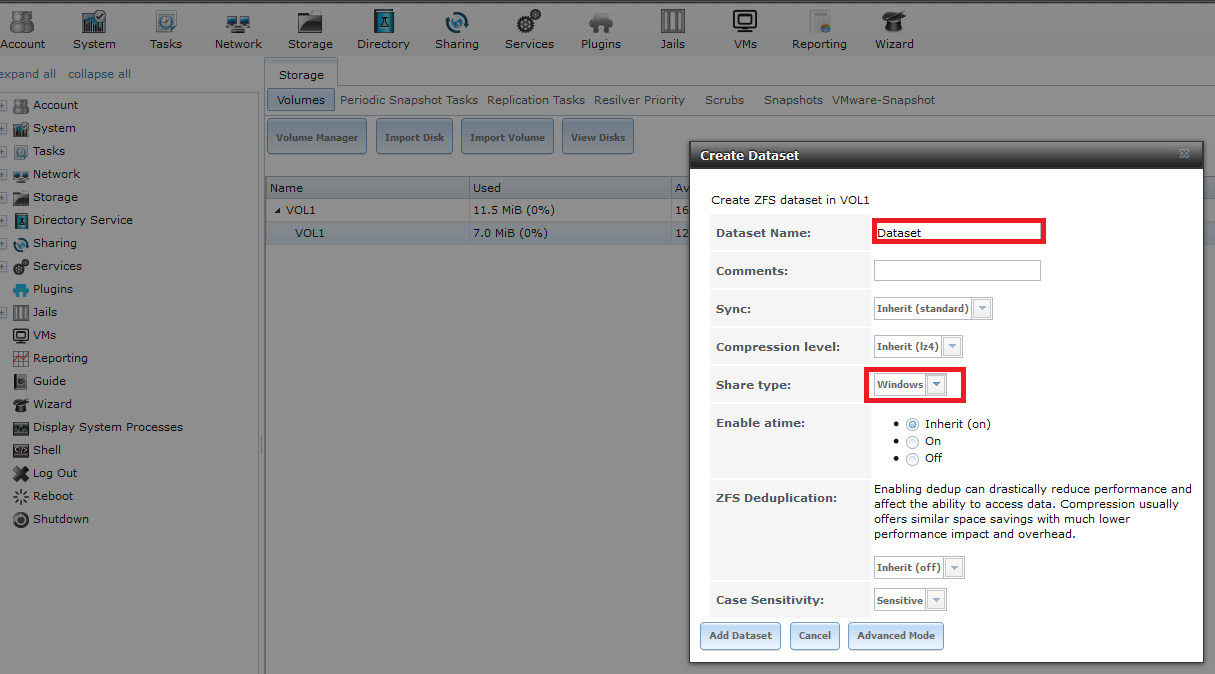
2. Goto Storage. Add new Dataset – “Create Dataset”
Set “Dataset Name” and “Share type” – Windows.
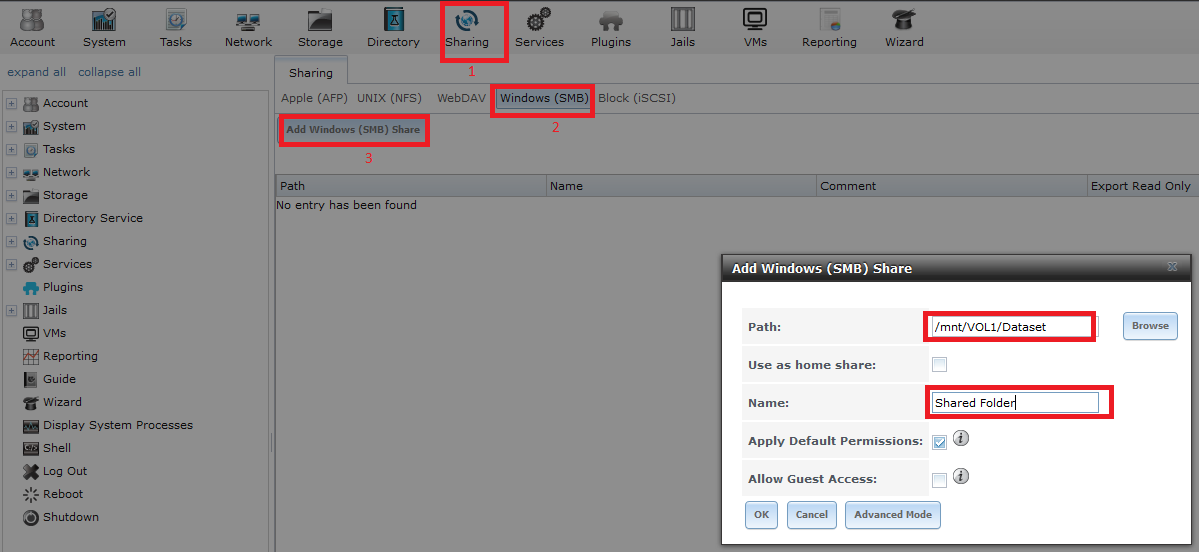
3. Add FeeNAS SMB Share
To add Windows (SMB) share navigate: Sharing -> Windows (SMB) -> Add Windows (SMB) Share
Set “Path” and “Name”
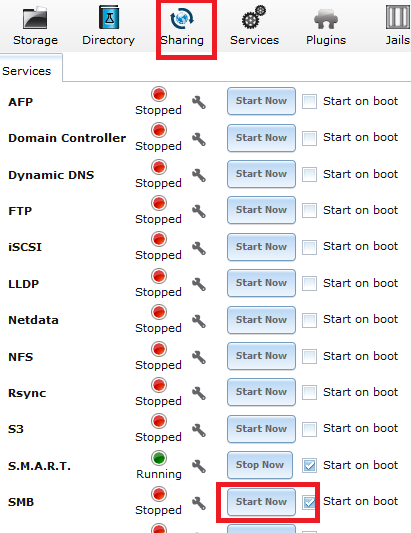
4. Enable Windows (SMB) share service: Services -> SMB -> Start Now
Check “Start on boot” radio button.
After last step shared SMB folder on FreeNAS should be accessible from windows machine, lets check. Don’t forget check “Start on boot also”.
5. Testing FreeNAS SMB shared directories on Windows 10
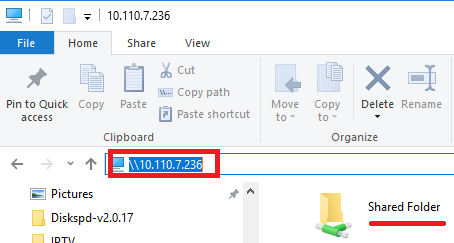
To access Windows (SMB) shared folder type IP address of FreeNas server in new window. In my case: \\10.110.7.236
Done


