Terraform Proxmox Tutorial

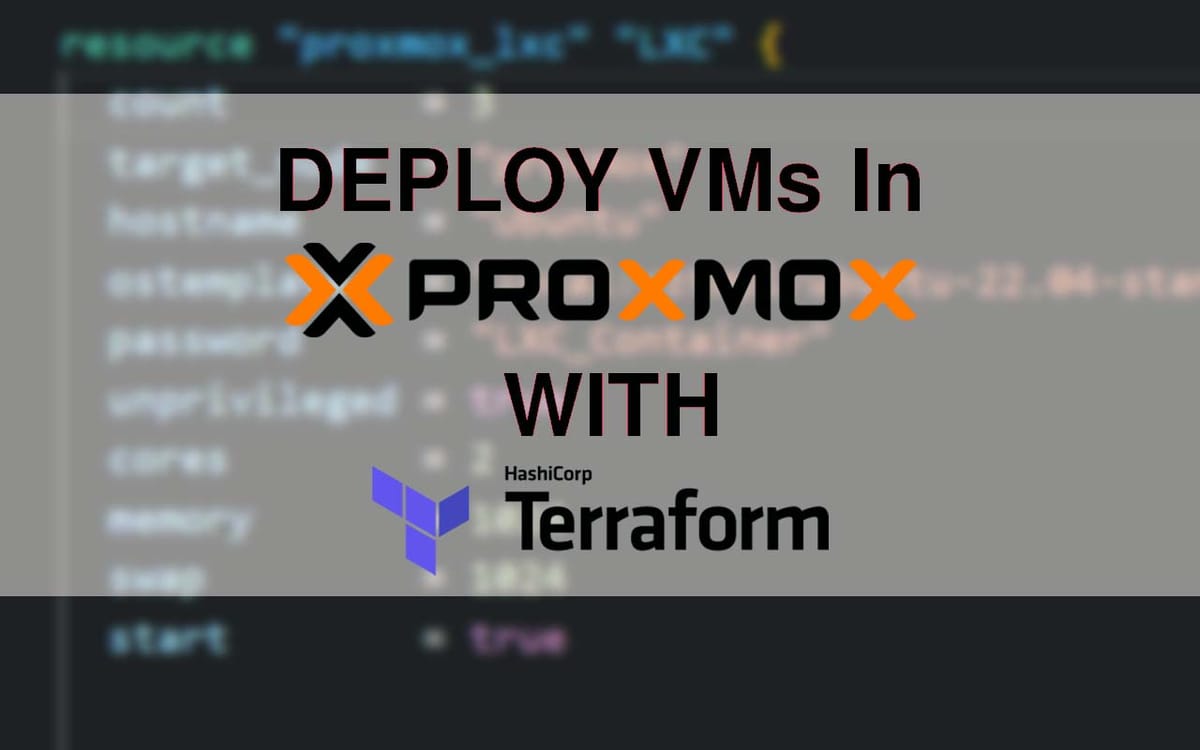
In this Terraform Proxmox Tutorial you will learn how to how to configure Proxmox and create VMs in Proxmox with Terraform.
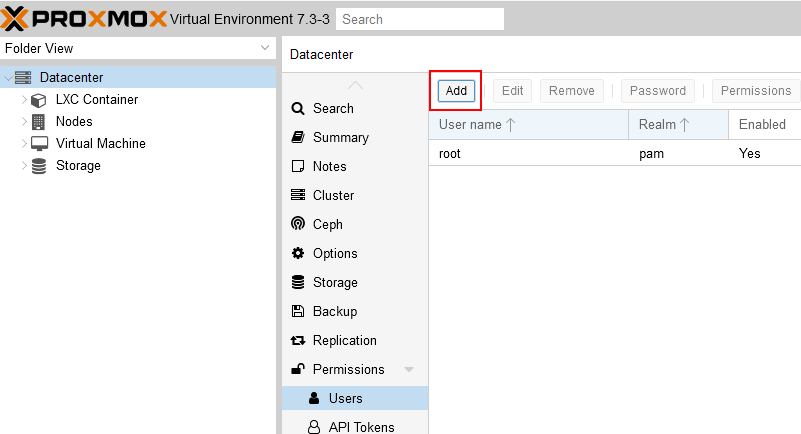
Create Terraform API User in Proxmox
We can deploy VM’s on Proxmox with Terraform by using “user/password” authentication method, or by using API key method. For this example we will use API key method.
1. Create User
First, let’s create new user – terraform_user.
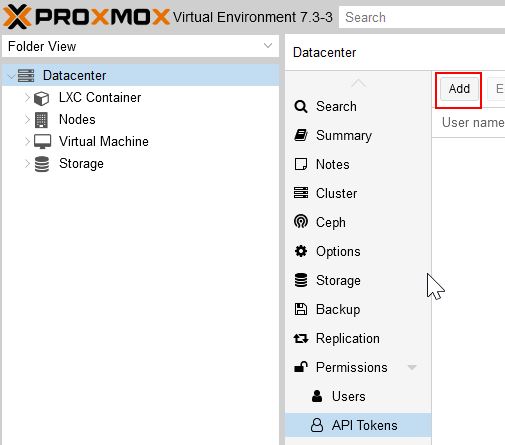
Go to Datacenter -> Permissions -> Users
And click “Add” button:
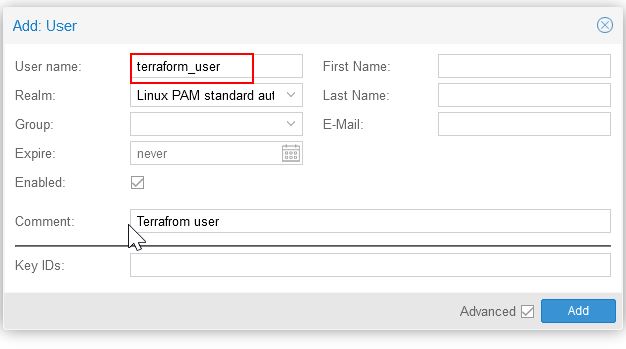
Then add new Proxmox user – terraform_user.
2. Create API Token in Proxmox
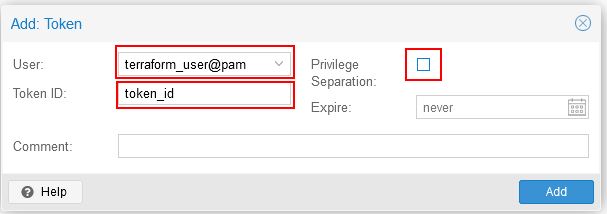
To create API token go to Datacenter -> Permissions -> API Tokens, and click “Add” button:
In Add Token window from drop-down list chose our new user and write down any Token ID. As shown on image.
!!! Do not forget uncheck “Privilege Separation” check-mark.
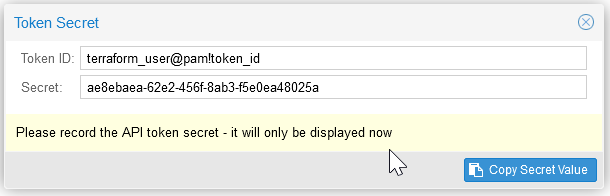
After clicking “Add” system will generate “Token Secret“.
Save in safe location the API token secret, because it will displayed only one time!
3. Proxmox Add User Permission
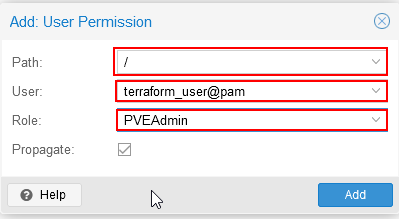
In final step lets add add permission to our user.
Go to Datacenter -> Permissions, and click “Add” button and chose User Permission in drop-down list.
Terraform Proxmox LXC Example
I’m assuming you already have Тerraform installed. So let’s jump right into the code example that deploys LXC container.
This is example code will deploy LXC container with Terreform in your Proxmox and start after creation (start = true).
It will create Ubuntu-22.04 LXC container with: 2 CPU’s, 1GB RAM, 1G SWAP, 4G storage.
Copy/Paste code into your IDE and make necessary changes in code.
You must change:
pm_api_url – Proxmox URL or IP.
pm_api_token_id – Your previously saved token
pm_api_token_secret – Your previously saved secret
ostemplate – path to your templates
storage – Depends your storage type: local-lvm, local-zfs, local
NOTE. It’s not a good idea to store passwords, pm_api_token_id, pm_api_token_secret in this file. Don’t do it in production!
##########################################
#       Terraform Proxmox Tutorial       #
#          Deploy LXC container          #
#                                        #
##########################################

terraform {
  required_providers {
    proxmox = {
      source  = "Telmate/proxmox"
      version = "2.9.11"
    }
  }
}

provider "proxmox" {
  pm_api_url          = "https://Your_Proxmox:8006/api2/json"
  pm_api_token_id     = "terraform_user@pam!token_id"
  pm_api_token_secret = "xxxxxxx-xxxx-xxxx-xxxx-xxxxxxxxxxx"

}

resource "proxmox_lxc" "LXC" {
  # count        = 3
  target_node  = "proxmox"
  hostname     = "Ubuntu"
  ostemplate   = "local:vztmpl/ubuntu-22.04-standard_22.04-1_amd64.tar.zst" //Change to Yours
  password     = "LXC_Container_Password"
  unprivileged = true
  cores        = 2
  memory       = 1024
  swap         = 1024
  start        = true

  rootfs {
    storage = "local-lvm" //Change to Yours
    size    = "4G"
  }

  network {
    name   = "eth0"
    bridge = "vmbr0"
    ip     = "dhcp"
  }
}
Terraform Proxmox Deploy VM
Now we can start deploying our VM.
First run command:
> terraform init
terraform init command will initialize a working directory containing Terraform configuration files.
Then run:
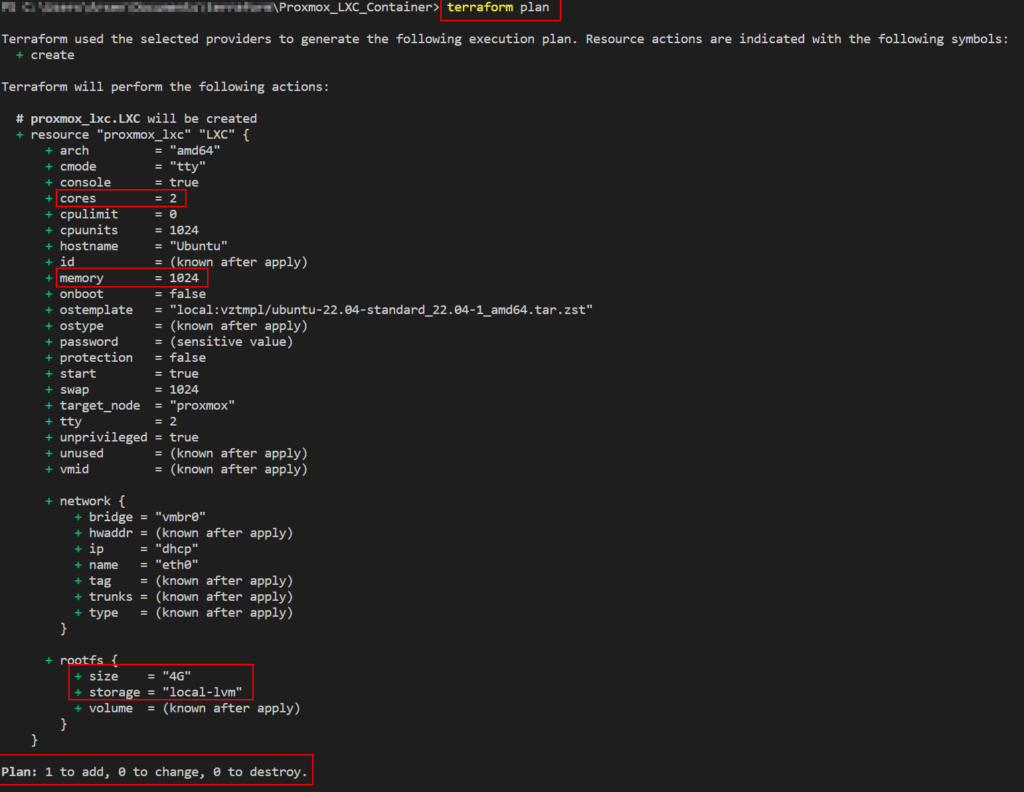
> terraform plan
terraform plan command creates an execution plan, which lets you preview the changes that Terraform plans to make to your infrastructure.
Example output:
Finlay execute:
> terraform apply
It will build VM proposed in a Terraform plan.
Conclusion
In this basic Terraform Proxmox tutorial you just learned how to configure your Proxmox Virtual Environment and deploy VM in Proxmox with Terrafrom.
On GitHub