How To Fix USB Drive Showing Wrong Size
How To Fix USB Drive Showing Wrong Size
Pen drive showing less space than actual
In this article i will show how to fix USB drive when showing wrong size USB drive showing wrong disk space is not a rare problem. In this tutorial we will fix USB flash drive capacity in Windows 10 without using any 3-rd party programs.
Windows have very powerful tools like DiskPart and Disk Management tool for working with disk partitions, like create new partition, delete partition, format disk.
!!! Before start make any changes backup your files, and make sure you selected right disk!
Insert your USB drive which showing incorrect disk space into USB port.
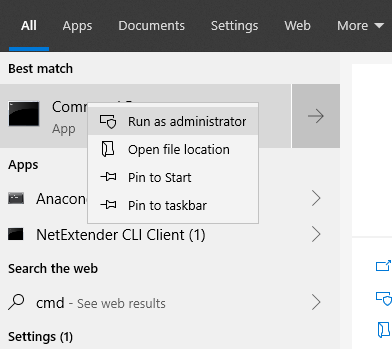
Open Windows 10 Command Prompt (CMD) as administrator:
Press Windows Key, and type cmd, on Command Prompt mouse right click and chose “Run as Administrator”:
Step 1
You will see Command Prompt window. Now we need run DiskPart utility type:
diskpart
Step 2
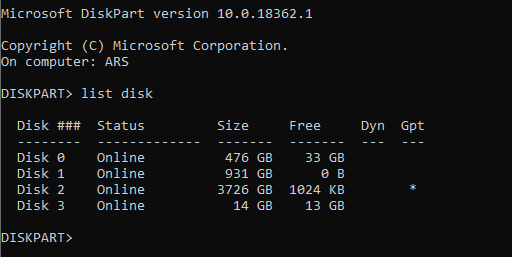
To see all USB disks and disk drives connected to your computer type:
list disk
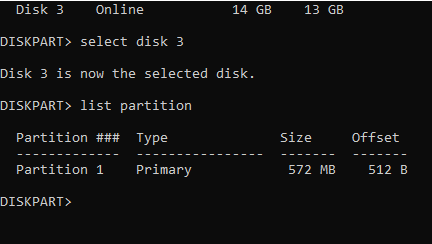
In my case USB disk shows as Disk 3, in your case you will see other disk number:
Step 3
Select USB disk number (change X with the your USB disk number):
select disk X
Step 4
To see partitions on selected drive type:
list partition
Step 5
And select partition (change X with the partition number you want to select):
select partition X
Step 6
Finlay delete partition on USB disk which you need to delete:
delete partition

You should get message: DiskPart successfully deleted the selected partition.
Type exit to exit from DiskPart or just close Command Prompt window.
Diskpart: Cannot delete a protected partition without the force protected parameter set
When you trying to delete partition you can see error:
Virtual Disk Service error:
Cannot delete a protected partition without the force protected parameter set.

In that case we need add override option to delete command:
DISKPART> delete partition override
Step 7
Time to open Windows Disk Management Windows tool.
Type disk management in the Windows 10 search bar then press Enter, or right click on “Start button” and choose “Disk Management“
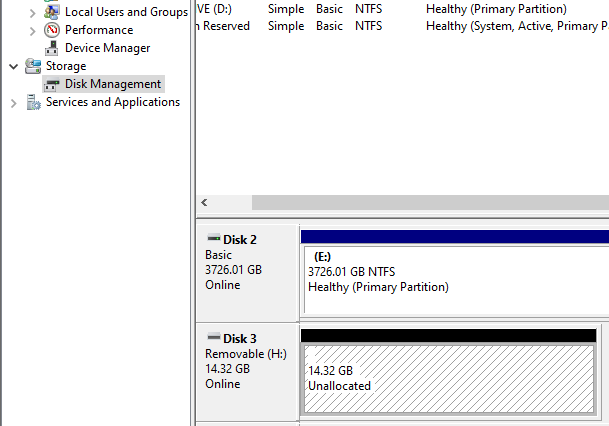
Right click on “Unallocated” space and choose “New Simple Volume”. As result will start “New Simple Volume Wizard“.
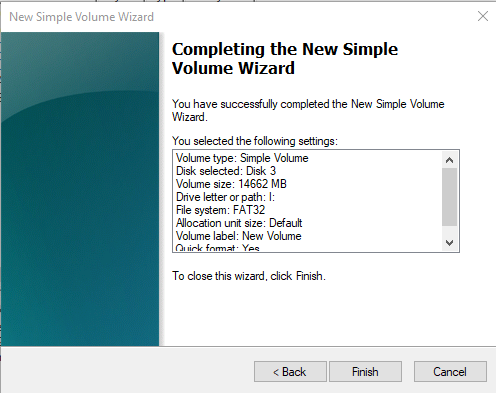
Press “Next” and Specify maximum Volume Size, again press “Next” and choose FAT32 file system, click “Next” and click “Finish”.
It will create new volume and format to FAT32 file system.
If you like what you are reading, please:
 Buy me a coffee


