How to configure PPTP Server on MikroTik


How to configure PPTP Server on MikroTik
PPTP is a secure tunnel for transporting IP traffic using PPP. PPTP encapsulates PPP in virtual lines that run over IP. PPTP incorporates PPP and MPPE (Microsoft Point to Point Encryption) to make encrypted links. The purpose of this protocol is to make well-managed secure connections between routers as well as between routers and PPTP clients (clients are available for and/or included in almost all OSs including Windows). PPTP traffic uses TCP port 1723 and IP protocol GRE (Generic Routing Encapsulation, IP protocol ID 47)
- Login into your MikroTIk RouterOS with Winbox, and go to IP -> Pool
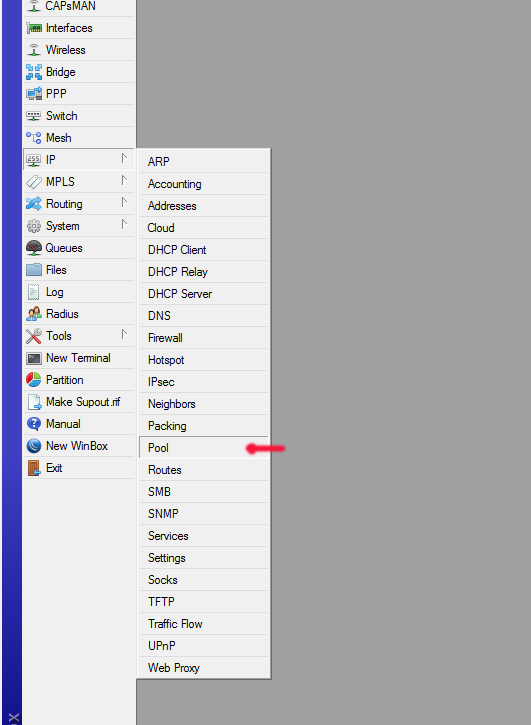
2. Create new IP Pool, and add IP range. In my case my new IP pool name is PPTP poll, and IP range 192.168.10.51-192.168.10.55.

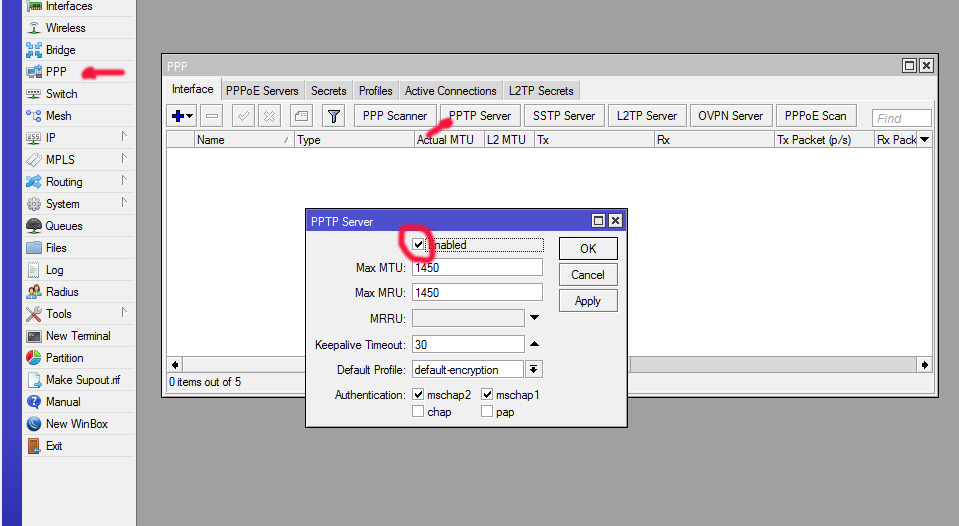
3. Goto PPP – >Interface, click PPTP Server an check first checkbox to”Enabled“, click OK for close PPTP Server window.
4. Switch to Profiles tab, and edit default-encryption profile. Set Local Addresses and Remote Addresses – PPTP Pool (as created in step 2):
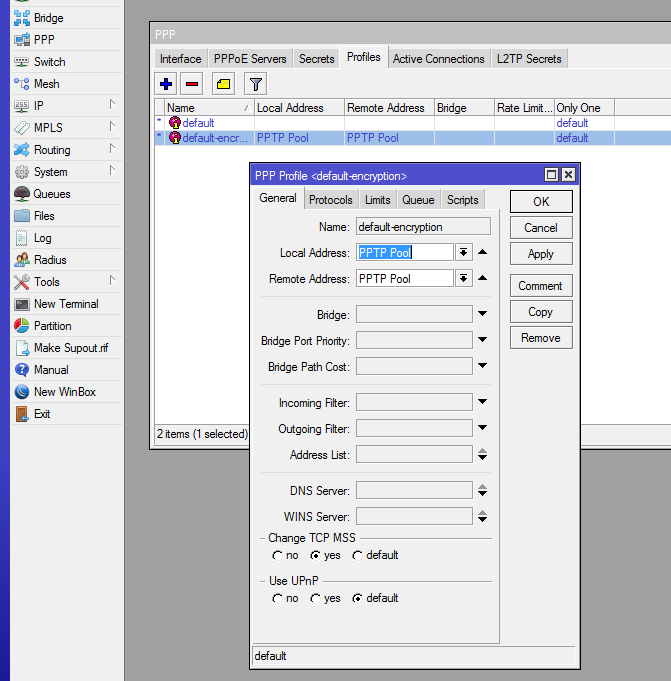
Click Ok for close window and accept settings.
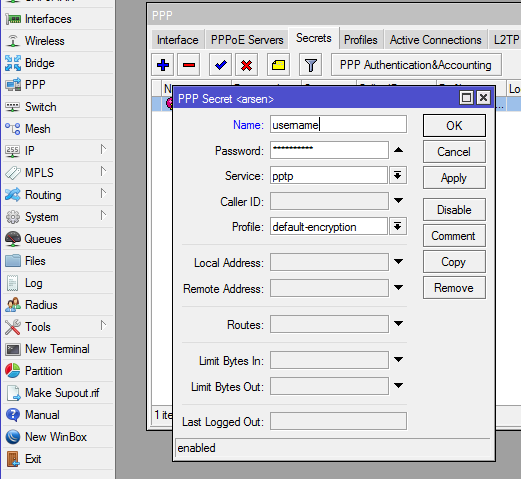
5. Switch to the Secrets tab. Create new user Name, Password. Select Sevice pptp and select just edited profile default-encription.
6. If you have configured firewall on your MicroTik RB, you need to open add new rule for incoming TCP connections for 1723 port.
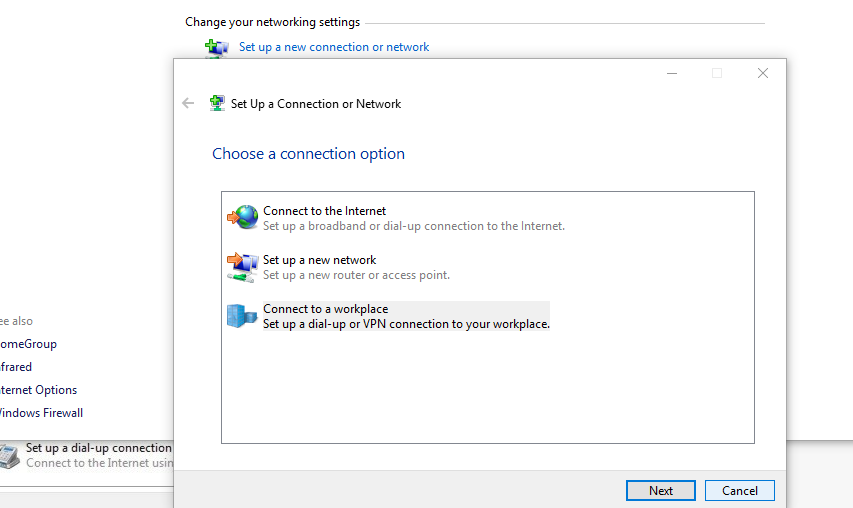
Now your PPTP Server is ready for accepting incoming connections and you need configure you client on Windows
Go to Network and Sharing Center in your Windows 10 machine and press “Set up new connection or network“, from new window select “Connect to a workplace.”
In next window choose “Use my Internet connection (VPN)“:
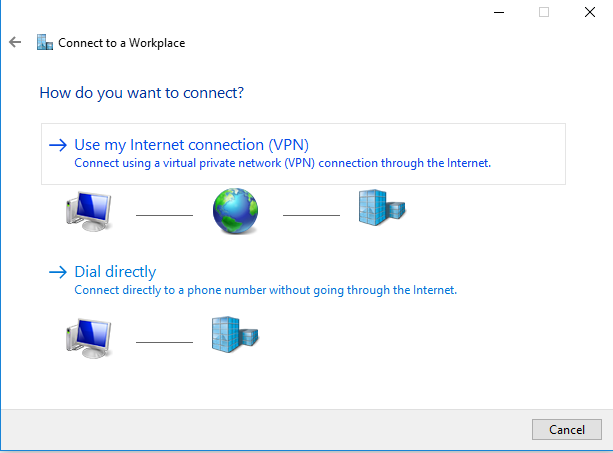
Type your MikroTik public IP address or hostname in next window.
For VPN connection username/password created in step 5.
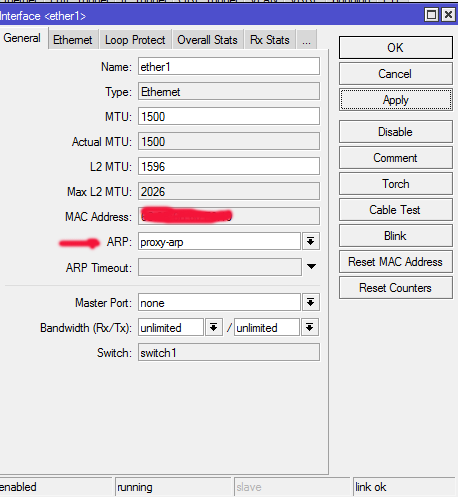
Note: You may have problem with accessing to others hosts in your remote network. Set up ARP to proxy-arp in your LAN interface configuration:
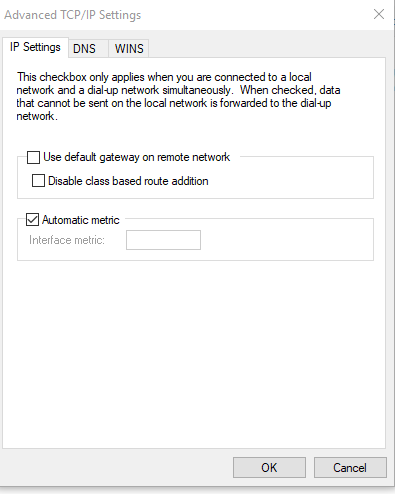
Do not forget disable “Use default gateway on remote network”
Go to Network Card properties.
Click on the Networking tab and double click Internet Protocol Version 4 (TCP/IPv4).
Click Advanced and uncheck the box for “Use default gateway on remote network.”