How to Squash All Commits in GitLab: A Step-by-Step Guide

Introduction
Squashing commits in GitLab can help streamline your commit history, making it easier to manage and more readable. This guide will show you how to squash all commits in a GitLab repository. Whether you are preparing for a pull request or simply cleaning up your commit history, this guide has got you covered.
What Does It Mean to Squash Commits?
Squashing commits involves combining multiple commits into a single commit. This process is particularly useful when you want to condense your commit history into a more manageable form before merging your branch.
Why Squash Commits in GitLab?
- Clean History: Simplify your commit history by removing unnecessary commits.
- Better Collaboration: Make it easier for collaborators to review changes.
- Improved Revertability: A single commit is easier to revert than multiple scattered ones.
How to Squash All Commits in GitLab
Step 1: Clone Your Repository
First, clone your GitLab repository to your local machine:
git clone <repository-url>
cd <repository-directory>
Step 2: Checkout to the Desired Branch
Navigate to the branch where you want to squash commits:
git checkout <branch-name>
Step 3: Start an Interactive Rebase
Begin the interactive rebase process:
git rebase -i HEAD~<number-of-commits>
Interactive Rebase (-i): The -i or --interactive flag starts an interactive rebase. This allows you to modify commits in various ways, such as reordering, editing, squashing (combining), or even dropping commits.
Replace <number-of-commits> with the total number of commits you want to squash. For example, if you want to squash the last 5 commits, you would use ‘HEAD~5’.
Or use command:
git rebase -i --root
'--root‘ Option: The --root option tells Git to start the rebase from the very first commit (the root commit) in the repository, instead of a specific commit or a range of commits.
When you use git rebase -i --root, it opens up your default text editor with a list of all commits in the branch, starting from the root commit. This gives you the opportunity to rewrite the commit history from the beginning.
Step 4: Mark Commits to Squash
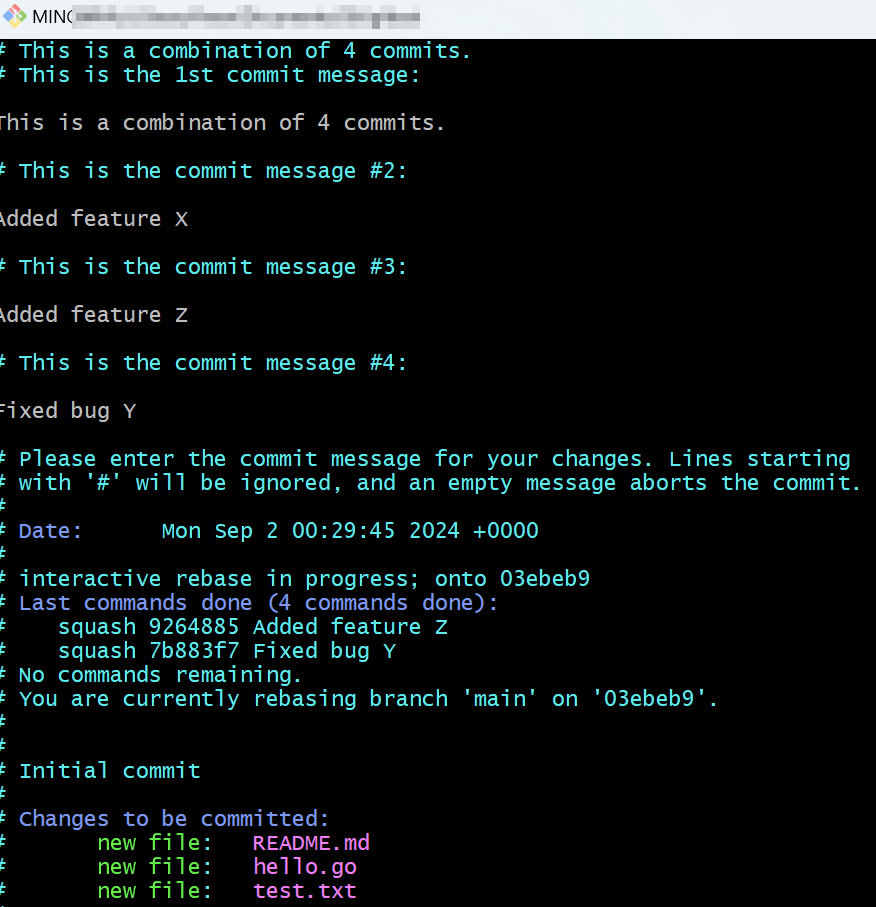
In the interactive rebase editor that opens, change the word pick to squash (or simply s) next to each commit you want to squash. Only the first commit should remain as pick.
Example:
pick 1234567 Initial commit
squash 2345678 Added feature X
squash 3456789 Fixed bug Y

Step 5: Save and Exit the Editor
After marking the commits, save and exit the editor. This will initiate the rebase process.
You may be prompted to edit the commit message – modify it as necessary and save.
Step 6: Force Push to GitLab
After successfully squashing the commits, you need to force push the changes back to GitLab:
git push origin <branch-name> --force
Step 7: Verify Changes
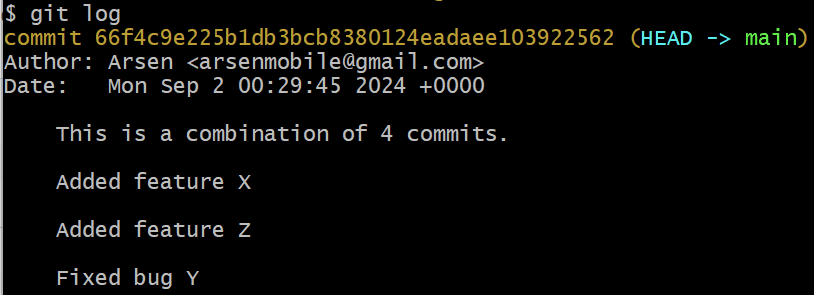
Finally, verify that your commits have been squashed by checking the commit history in your GitLab repository:
git log
You should see a single commit that represents all the changes.
Conclusion
Squashing commits in GitLab is a powerful tool to maintain a clean and efficient commit history. By following this guide, you can easily combine multiple commits into one, making your repository more manageable and easier to collaborate on. Don’t forget to force push your changes to update the GitLab repository!